Thursday, 25 July 2013

How To Make Salt Dough

Simply follow the method below,adjusting the quantities to make the amount 

of salt dough you need. The quantities given below are sufficient to make a 

bowl of salt dough.The addition of 1 tbsp vegetable oil to the recipe adds 

suppleness, while 1 tbsp wallpaper paste gives the dough elasticity.


you will need:

2 cups plain flour
1 cup salt
1 cup water


1- mix the flour,salt and half the water in a bowl.

2- knead the mixture,gradually adding more water until the dough has a smooth, firm consistency.  be careful not to add too much water or the dough will sag and become sticky.

3- remove the dough from the bowl and continue to knead for 10 minutes.  the dough can be modelled immediately,but is best left to rest for 30 minutes in an airtight container.

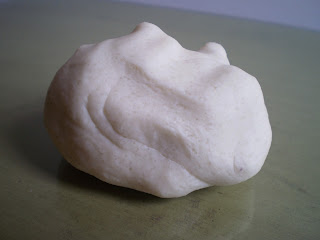
this is the dough I made


I did not add oil or wallpaper paste

here is what I made with it


The cube was my first try then I
made the caterpillar on the leaf , then the music note and then the roses


 you have to bake your creations in an oven at 120 degree c / 250 degree f
until they are completely hardened.

but I got an idea an heated them in the micro for 1 minute and they were completely hardened.

remember to keep the dough in an airtight container
Saturday, 20 July 2013

Hanging Shapes

Different symbols and shapes are used to create an original mobile , Which will catch light if you decorate it with glass panels and glass beads.


you will need:

1. modeling clay
2. pencil
3. card
4. scissors
5. thin wire
6. glass beads of different colors
7. clay modeling tools
8. sandpaper


1. roll out the modeling clay to a flat sheet (at least 5mm thick).

2.  draw different shapes and symbols on the card and cut them out.

3. place the shapes on the clay sheet and cut around them with a modeling tool.

4. smooth all the surfaces and edges of the shapes.

5. if you want you can lift up the edges of the shapes with wet fingers.

6. decorate the shapes with glass beads.

7. pierce a small hole in the top and bottom of the shape and allow to dry thoroughly. 

8. if you like you can sand down all the edges once the shapes have dried.

9. use the thin wire to join all the shapes together .

you can hang them anywhere you like , but the best place is a window so that the beads can catch light.


Wednesday, 10 July 2013

Cut-out Photos

In this art the two halves of the picture are identical in design. Yet one is the negative image of the other. these cut-outs are very simple and easy to make


you will need:

card or paper in two colors
glue
pencil
craft knife


1-draw a picture like it would be on a stencil on the wrong side of a piece of paper.
2-using a craft knife cut out through the picture and reserve all the shapes.
3- turn the paper and glue it to a piece of paper or card which is twice the size of the other paper.
4- arrange the cut-outs on the other side of the paper to match the original design and glue them when satisfied with the arrangement. 


you can also make cards using this art just fold the picture from the centre when done.


Monday, 8 July 2013

The easiest way to be more creative

 if you want to be creative then the easiest way is very simple just draw some cartoons and emotions using your imagination.

If you don't have any ideas ,then just look around you because surely you will find some inspiration. 

this is the simplest way to boost your imagination and be more creative.


Please tell me if this idea worked for you because the only reason I posted this was because it worked for me.